Day 19 Task: Docker for DevOps Engineers
Day 19 of 90 Days of DevOps


Table of contents
- Docker-Volume
- Docker Network
- Task-1
- Task-2
- Learn how to use Docker Volumes and Named Volumes to share files and directories between multiple containers.
- Create two or more containers that read and write data to the same volume using the docker run --mount command.
- Verify that the data is the same in all containers by using the docker exec command to run commands inside each container.
- Use the docker volume ls command to list all volumes and docker volume rm command to remove the volume when you're done.
Docker-Volume
Docker allows you to create something called volumes. Volumes are like separate storage areas that can be accessed by containers. They allow you to store data, like a database, outside the container, so it doesn't get deleted when the container is deleted. You can also mount from the same volume and create more containers having the same reference

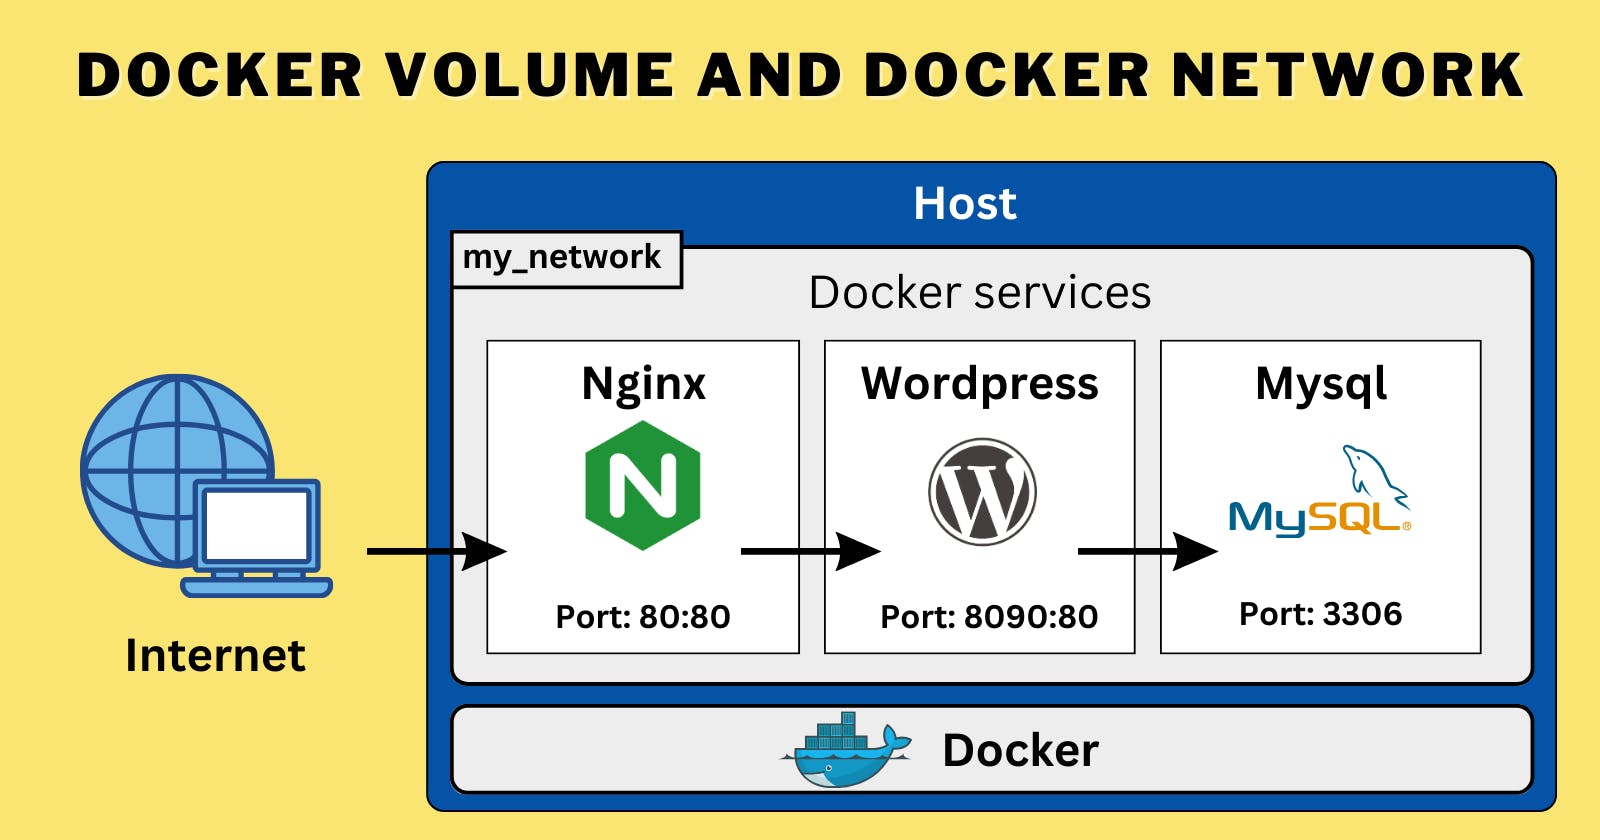
Docker Network
Docker allows you to create virtual spaces called networks, where you can connect multiple containers (small packages that hold all the necessary files for a specific application to run) together. This way, the containers can communicate with each other and with the host machine (the computer on which the Docker is installed). When we run a container, it has its own storage space that is only accessible by that specific container. If we want to share that storage space with other containers, we can't do that. reference
Task-1
Create a multi-container docker-compose file which will bring UP and bring DOWN containers in a single shot ( Example - Create application and database container )
  version: '3'
  services:
    app:
      build:
        context: ./app
        dockerfile: Dockerfile
      ports:
        - 8080:8080
      depends_on:
        - db

    db:
      image: mysql:latest
      restart: always
      environment:
        MYSQL_ROOT_PASSWORD: root
        MYSQL_DATABASE: myapp
        MYSQL_USER: myuser
        MYSQL_PASSWORD: password
      ports:
        - 3306:3306
      volumes:
        - db_data:/var/lib/mysql

  volumes:
    db_data:
In the above Docker Compose file:
We define two services:
appanddb.The
appservice is built from a Dockerfile located in the./appdirectory. You'll need to create the Dockerfile for your application code.The
appservice maps port 8080 of the host to port 8080 of the container.The
appservice depends on thedbservice, which means thedbcontainer will be started before theappcontainer.The
dbservice uses themysql:latestimage and sets environment variables for the MySQL root password, database name, user, and password.The
dbservice maps port 3306 of the host to port 3306 of the container and uses a volume (db_data) to persist the MySQL data.
To bring up the containers, navigate to the directory where the docker-compose.yml file is located and run the following command:
docker-compose up -d
The -d flag is used to run the containers in detached mode.
To bring down the containers, use the following command:
docker-compose down
This will stop and remove the containers, as well as the associated volumes.
Make sure you have Docker and Docker Compose installed on your machine before running the above commands.
Task-2
Learn how to use Docker Volumes and Named Volumes to share files and directories between multiple containers.
Create two or more containers that read and write data to the same volume using the
docker run --mountcommand.Verify that the data is the same in all containers by using the docker exec command to run commands inside each container.
Use the docker volume ls command to list all volumes and docker volume rm command to remove the volume when you're done.
Docker volumes and named volumes are useful for sharing files and directories between multiple containers. Let's go through an example where we create two containers that read and write data to the same volume using the docker run --mount command. We'll then verify that the data is the same in all containers using the docker exec command.
Step 1: Create a Docker Volume Let's create a named volume using the docker volume create command:
docker volume create mydata
Step 2: Run Containers with Shared Volume Now, we'll run two containers that share the same volume using the --mount flag:
Container 1:
docker run -d --name container1 --mount source=mydata,target=/data alpine tail -f /dev/null
Container 2:
docker run -d --name container2 --mount source=mydata,target=/data alpine tail -f /dev/null
In the above commands, we're running two alpine containers named container1 and container2. The --mount flag is used to mount the mydata named volume to the /data directory inside each container.
Step 3: Write Data to the Volume Let's write some data to the volume from one of the containers. We'll use container1 for this example:
docker exec container1 sh -c "echo 'Hello, World!' > /data/test.txt"
Step 4: Verify Data in the Other Container Now, let's verify that the data is the same in the other container (container2). We'll use the docker exec command to run a command inside the container:
docker exec container2 cat /data/test.txt
This should output Hello, World!, indicating that the data in the shared volume is accessible from both containers.
Step 5: Clean Up To list all volumes, you can use the docker volume ls command:
docker volume ls
To remove the volume, you can use the docker volume rm command:
docker volume rm mydata
Please note that you should remove the volume only when you're done with it, as it will permanently delete all the data stored in that volume.
That's it! You've successfully created two containers that read and write data to the same volume using Docker volumes and named volumes.